

Anyone considering rhinoplasty wants, first of all, to see results. That is natural: before and after photographs are the most direct way to understand what a surgeon can do and whether their style matches what you are looking for. But not all galleries show the same thing, and there are details that make all the difference when assessing them.
In this article we explain what to look for in a rhinoplasty before and after gallery, show a real case operated on by Prof. Dr. Miguel Gonçalves Ferreira and describe what changes, angle by angle, in a well-operated nose.
What to look for in a before and after gallery
- Several angles. A nose is assessed from the front, in profile (both sides), at three quarters and, ideally, from below. A gallery with only profiles hides half the story.
- Time of evolution. The final result of rhinoplasty takes about a year to settle. Photographs taken weeks after surgery still show swelling and cannot be used to judge the result.
- Same light, same position. The before and after should be photographed under the same conditions. Changes in light, angle or make-up can simulate improvements the surgery did not make.
- No editing. Filters and retouching are a warning sign. What you want to see is real skin, with pores and imperfections.
- Cases similar to yours. Look for noses with the same type of problem as yours: hump, drooping tip, crooked nose, wide nose, revision.
- Consistency. More important than one spectacular case is seeing that all cases have a natural result adapted to each person’s face.
A real case: small changes, big achievements
This case brought together three of the most frequent requests at the consultation: a marked hump on the bridge, a drooping tip that weighed down the profile and a slightly deviated nose. Each of these points, on its own, is already a challenge. All three together require careful planning, because correcting one without considering the others compromises the balance of the face.
The goal was never to create a new nose, but to restore harmony to what was already there: soften the bridge, lift and define the tip and align the nose with the rest of the face, keeping the patient’s identity and free breathing.
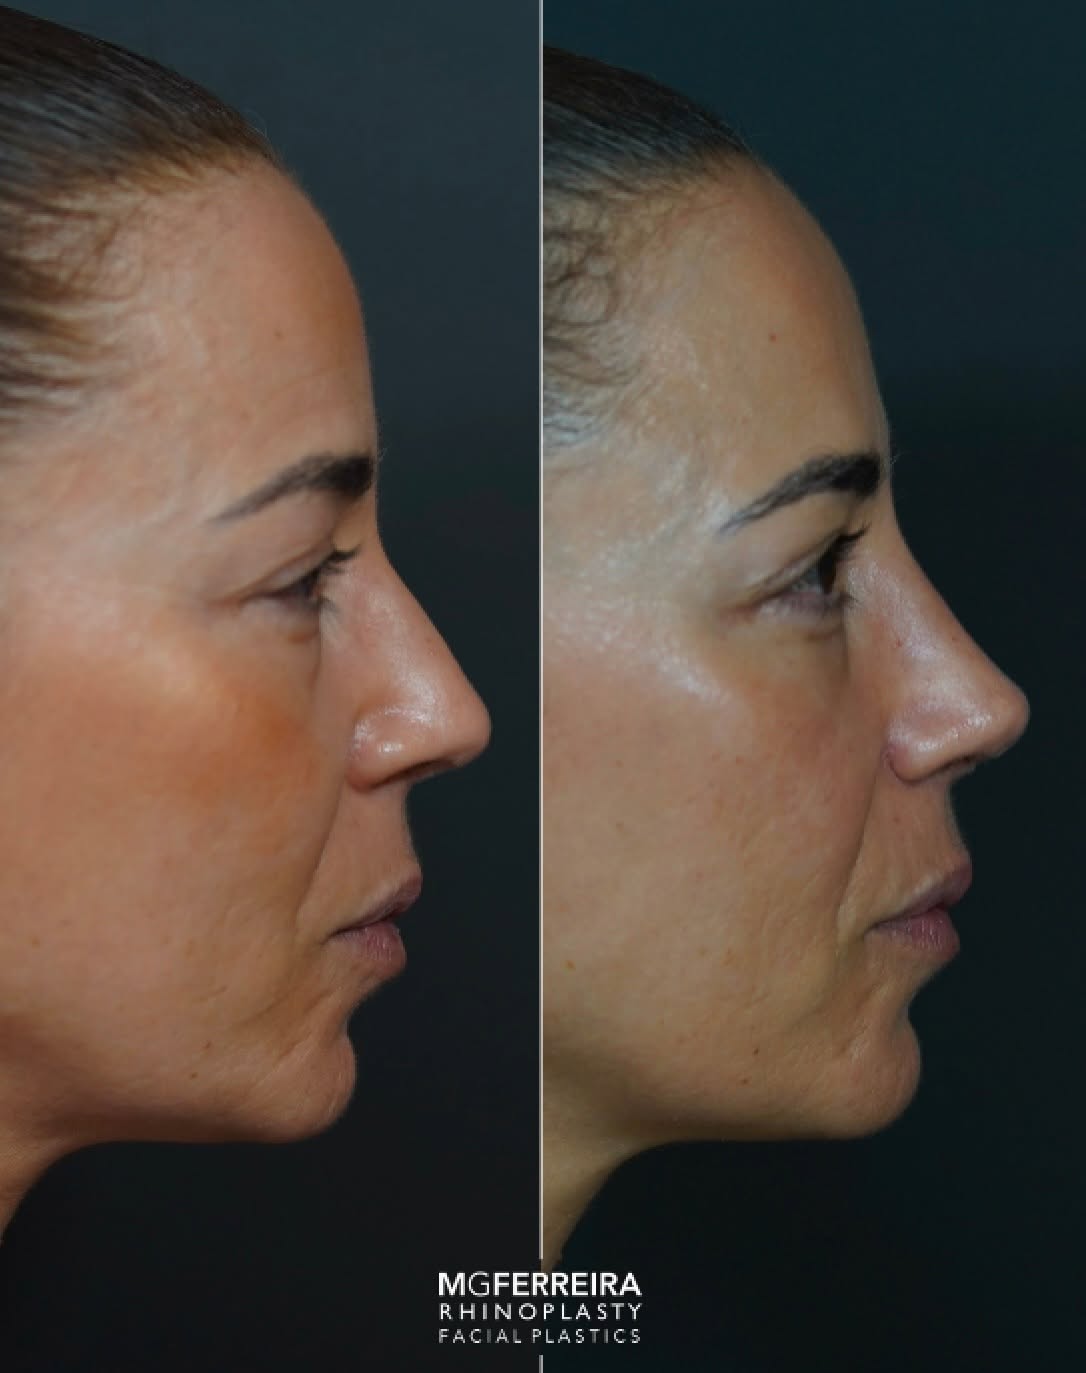
Right profile: the bridge becomes straight and the tip lifts.
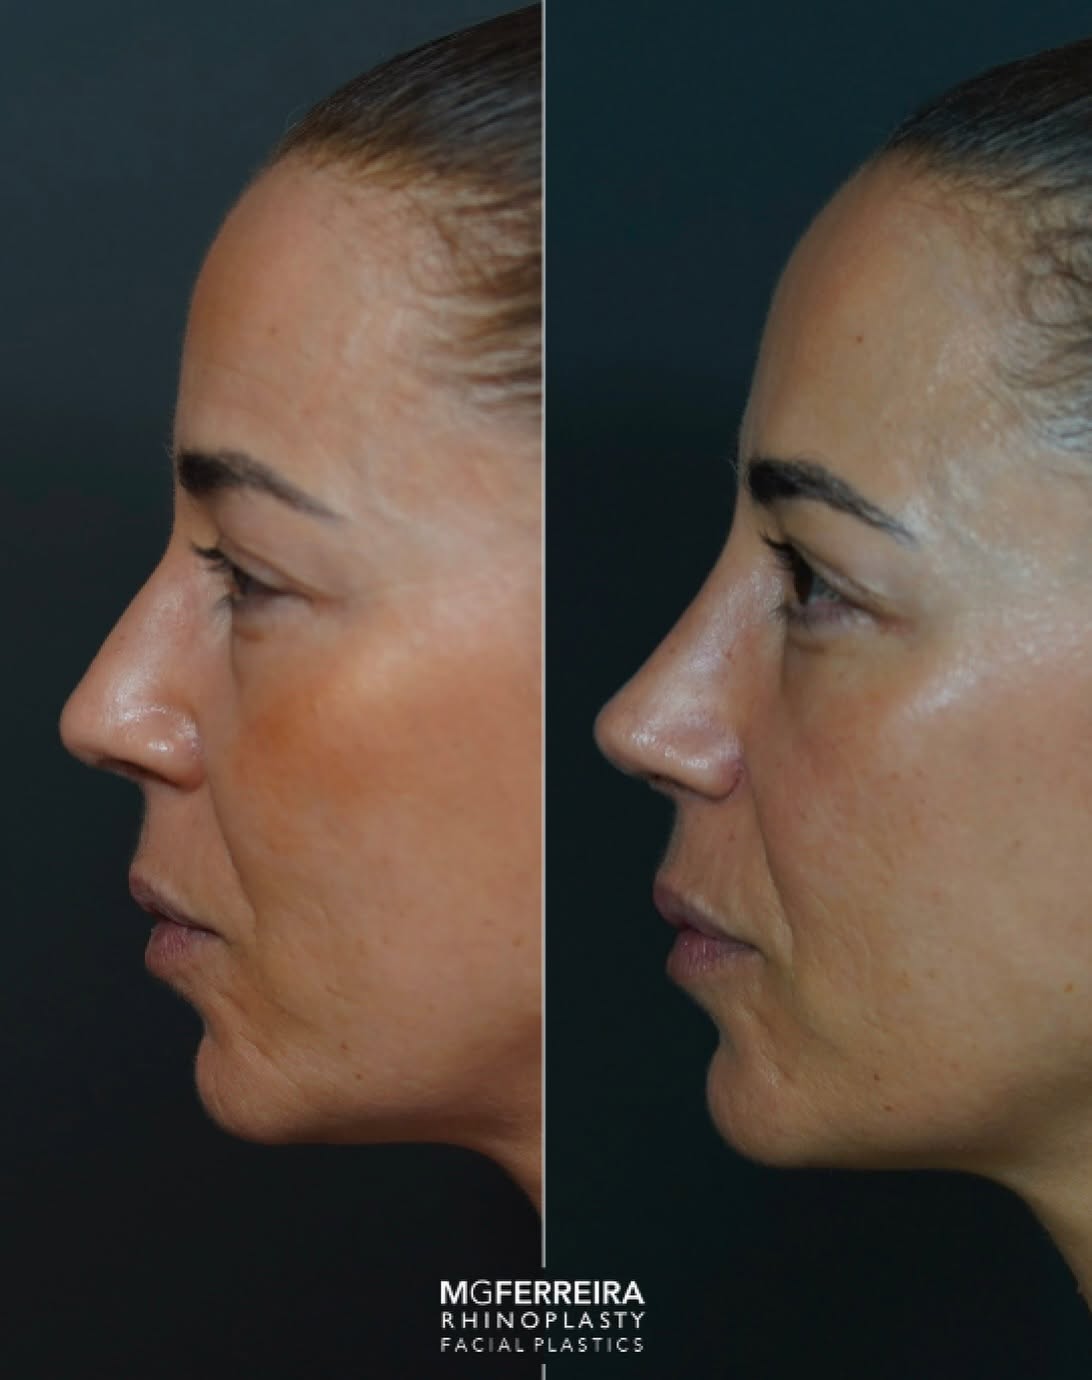
Left profile: the hump disappears without exaggeration.
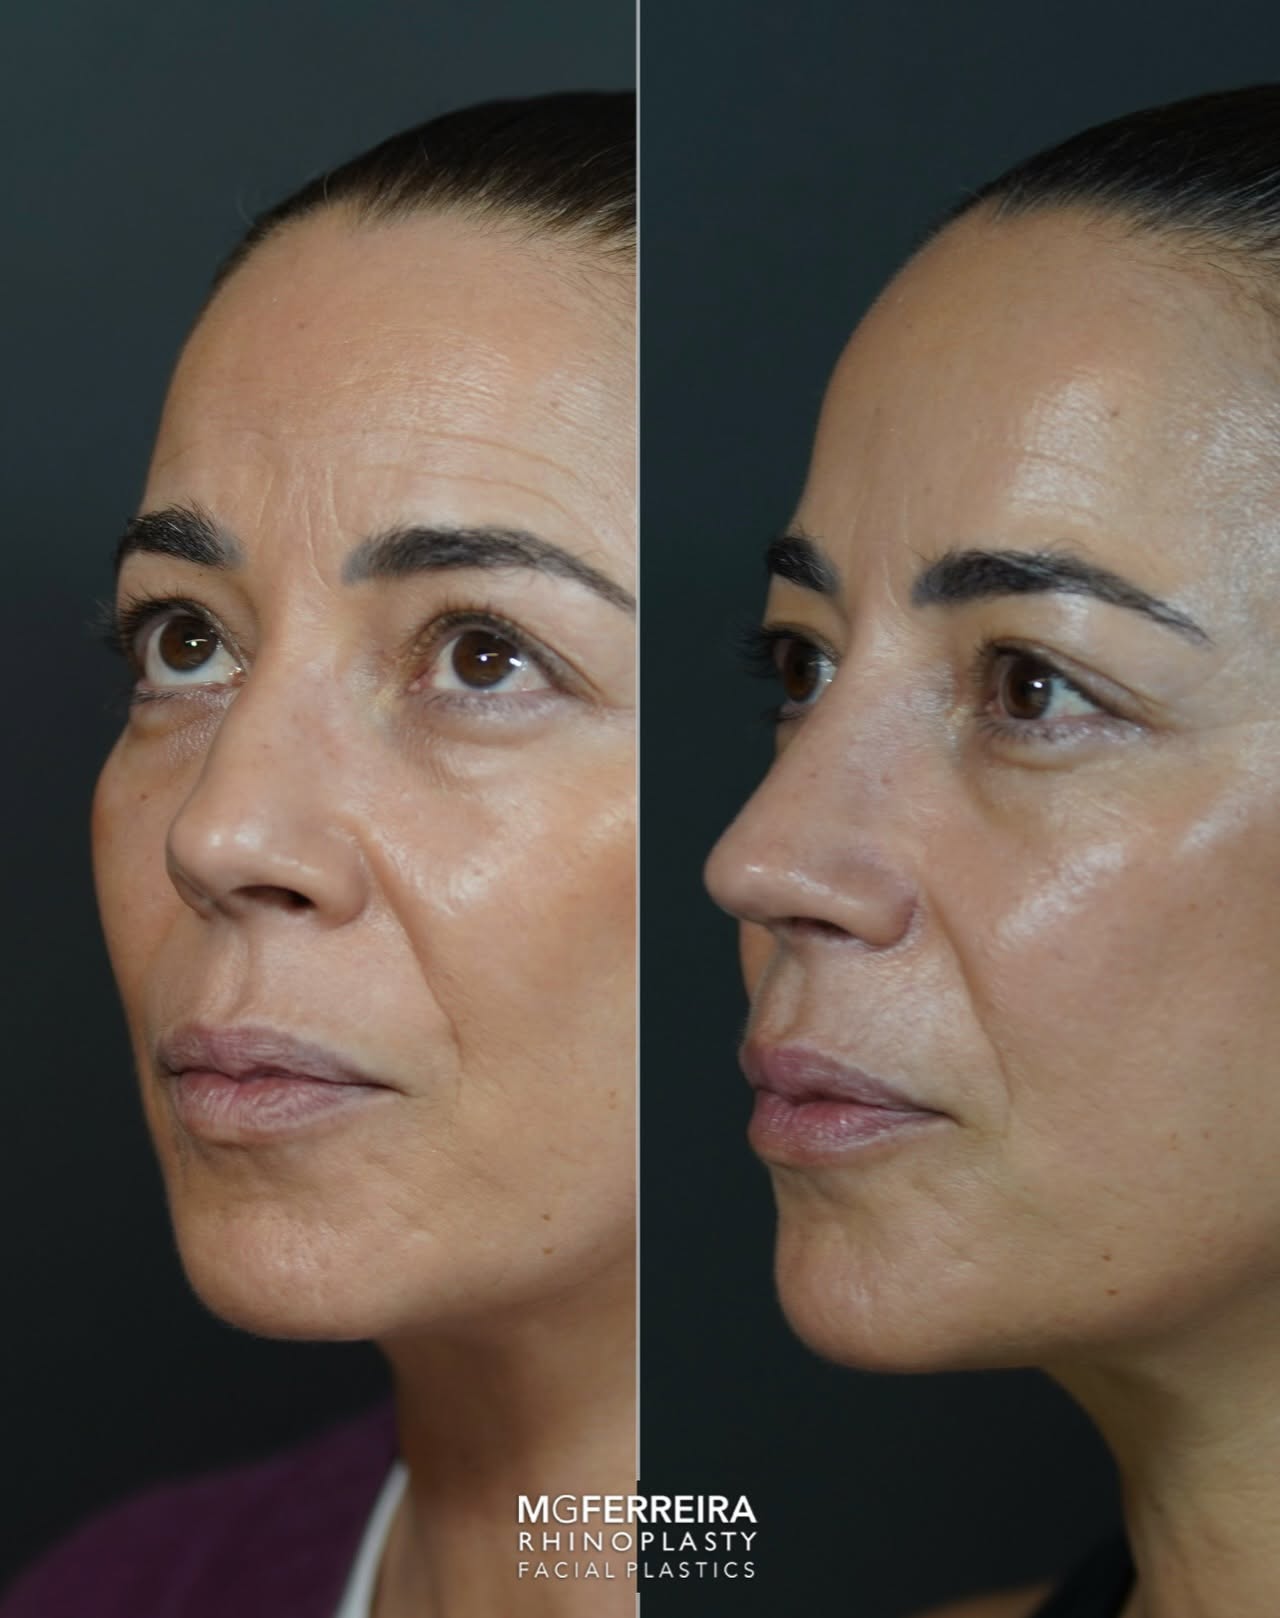
Right three-quarter view: the tip gains definition.
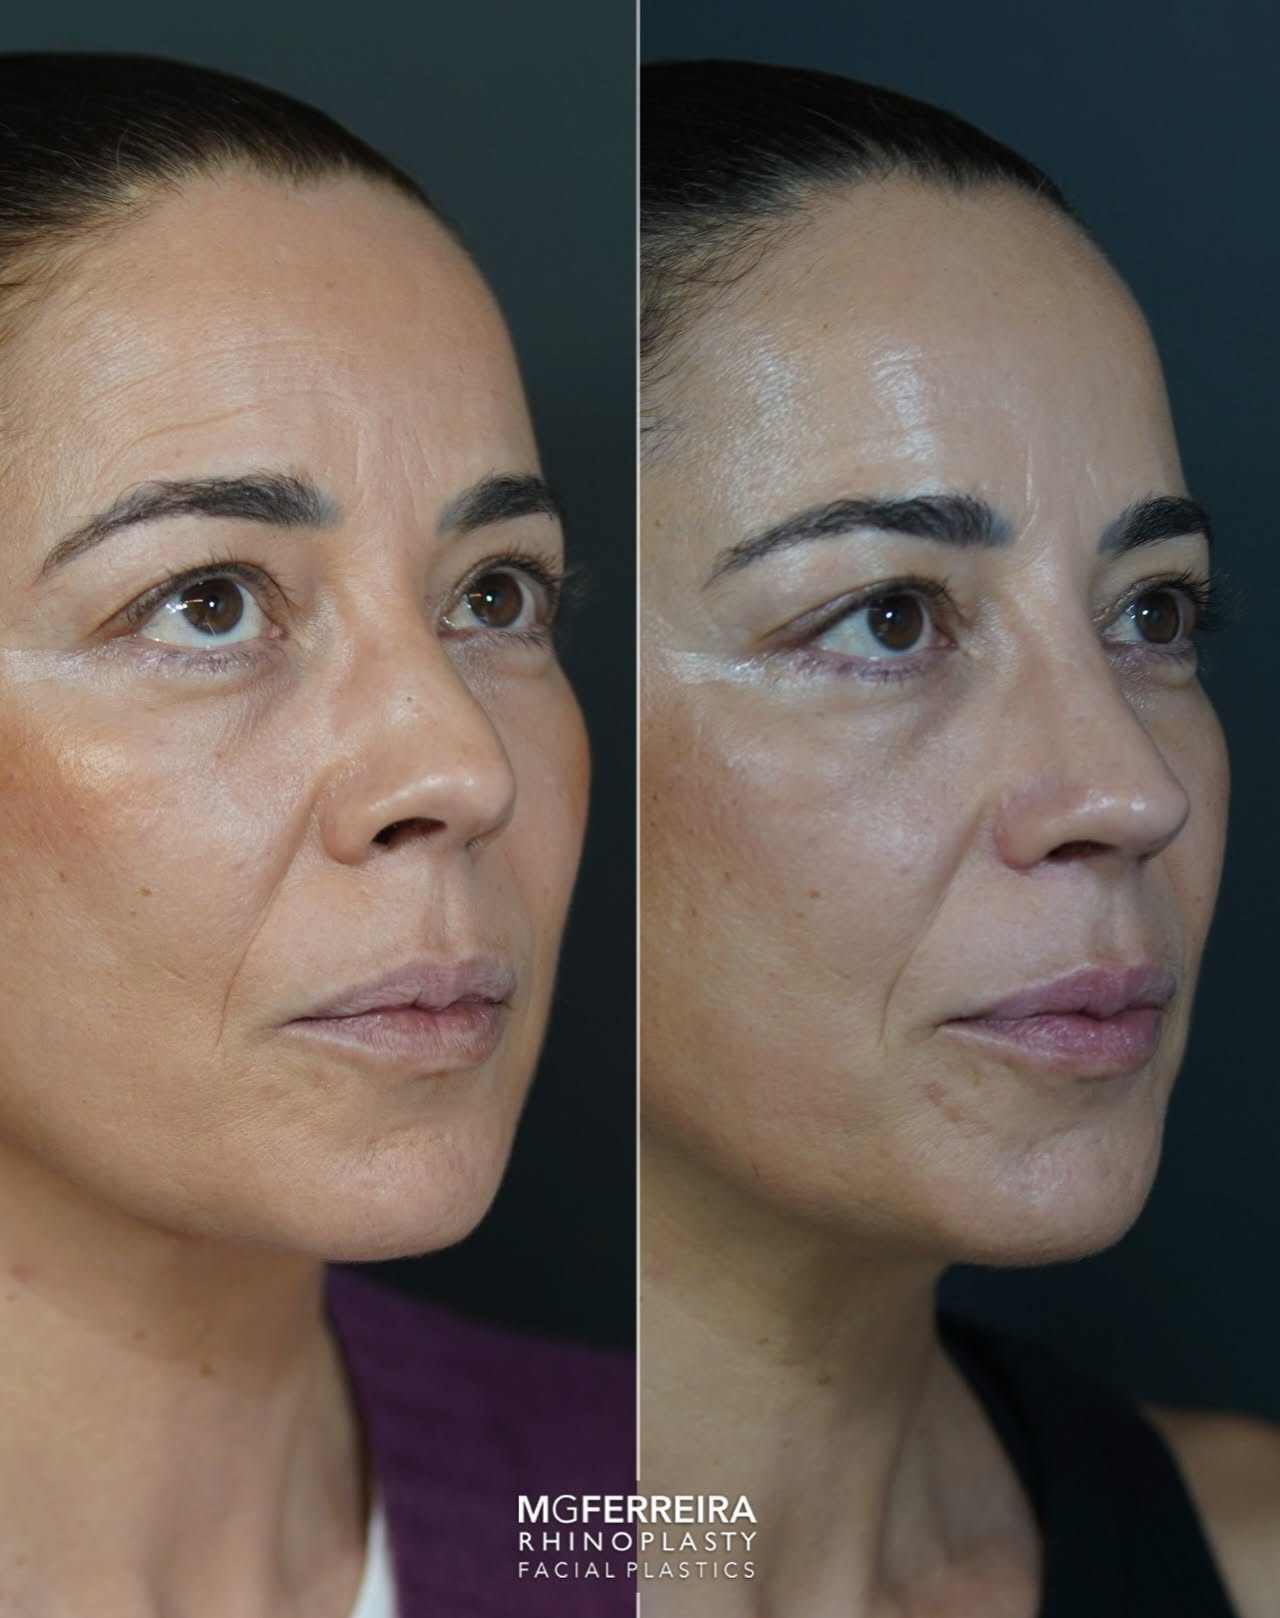
Left three-quarter view: softer lines, a lighter face.
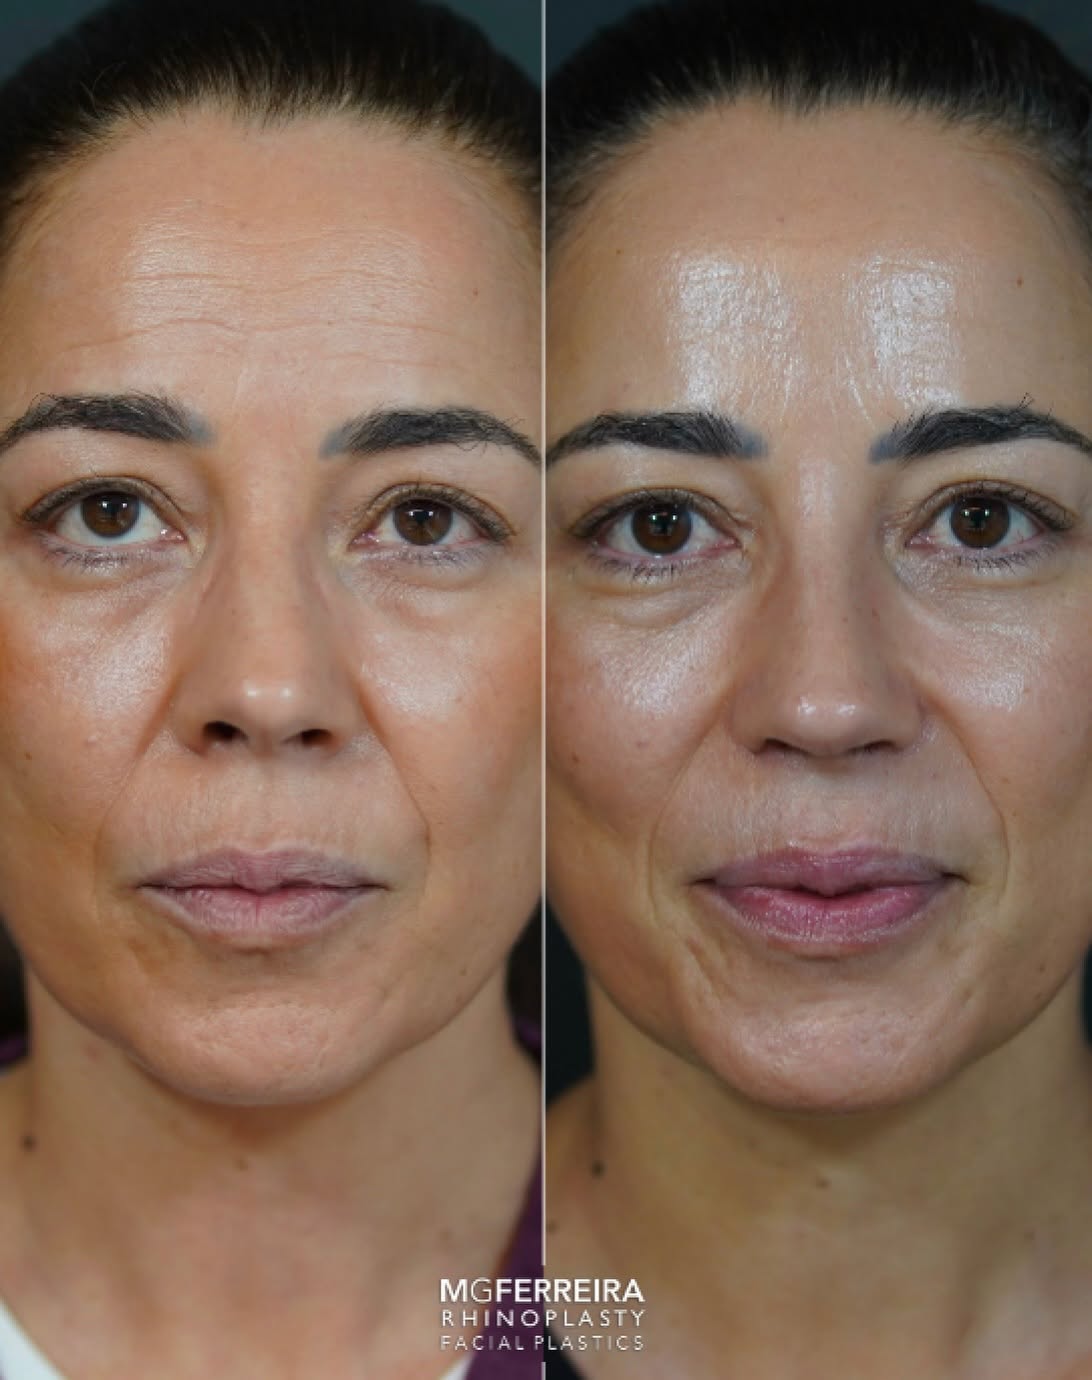
Front: the nose is aligned and proportionate.
The result is what we aim for in every rhinoplasty: small changes, with a big effect. In profile, a straight bridge and a tip in the right place. From the front, an aligned, proportionate nose. And, above all, a natural result: nobody says it was operated on, everyone notices it looks better.
Nothing beats this satisfaction.
What changes in a well-operated nose, angle by angle
- In profile: the bridge becomes straight or slightly concave, with no hump or saddle; the tip lifts to the right angle in relation to the lip and no longer looks heavy.
- From the front: the nose is centred and aligned with the middle of the face; the lines of the bridge are continuous and soft; the tip is defined, without being pinched.
- At three quarters: it is the angle where the hump and the drooping tip are most noticeable, and so where the change is felt most.
- From below: the nostrils are symmetrical and the base of the nose proportionate to the face.
- Breathing: what cannot be seen in photographs, but counts as much as everything else. A beautiful nose that breathes badly is not a good result.
When is the final result seen?
The after photographs are usually taken from one year of evolution onwards. Before that, the nose is still de-swelling, especially at the tip. If you want to know how recovery evolves, read how long does rhinoplasty take and the week-by-week guide.
Warning signs in before and after galleries
- Photographs only in profile, or only from one side.
- Results shown with only a few weeks of evolution.
- Different light, angle or make-up between the before and the after.
- Edited images or filters.
- All noses looking the same, regardless of the face. A good result is made to measure.
- Photographs that are not of the surgeon’s own patients.
To find out what other questions to ask before deciding, read how to choose a rhinoplasty surgeon in Porto.
Frequently asked questions
Can I see cases similar to mine?
Yes. At the consultation, the surgeon shows cases with the same type of problem as yours, from several angles and with more than a year of evolution.
Is it possible to predict my result?
At the consultation a 3D simulation is made with Crisalix, from photographs of your face, which helps align expectations. It is a conversation tool, not a guarantee of the result.
Will my nose look like the ones in the photographs?
Every nose is different and the goal is always a natural result proportionate to your face, not to copy someone else’s nose.
Are patient photographs published with permission?
Yes. We only publish cases with the patient’s express consent.
See more results and book your consultation
At Clínica do Nariz e Face, rhinoplasty is performed by Prof. Dr. Miguel Gonçalves Ferreira, a specialist in Otolaryngology, Head and Neck Surgery, dedicated to rhinoplasty. See more cases on our clinical cases page and learn about the rhinoplasty in Porto or rhinoplasty in Braga.
Book your consultation or call +351 915 808 584.
This article is for information purposes only and does not replace a medical consultation. Results vary from person to person.